
|
Elasund: The First City of Catan A game by Klaus Teuber Published by Mayfair Games, Inc. and Kosmos Players: 2-4 Time: 60 minutes Reviewed by Susan Rozmiarek |
|
Elasund: The First City is the second game in the "Catan Adventures" series, the first being Candamir: The First Settlers. Now that the island of Catan has been settled, the fearless Catanians are ready to build their first city and call it Elasund, after their ancestral town in their old homeland.
Like Candamir, Elasund contains a few hints of Teuber's classic Settlers of Catan but it is in fact a very different game from either. Unlike the gentle, solitaire-like Candamir, Elasund takes the series in an entirely new direction that includes lots of player interaction. No more foraging alone in the wilderness on the island, in this game you'll be competing head-to-head for the prime building spots in Catan's first city. Competition can be both brutal and nasty as players' smaller buildings get demolished to make way for their opponents' larger ones. This is a game with teeth and not for overly sensitive players!
What comes in the box
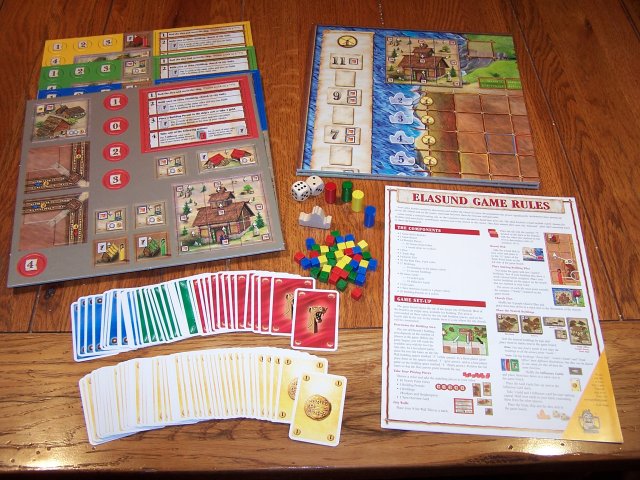
Once again, Kosmos and Mayfair have produced a game with high quality, attractive components that are well designed to facilitate game play. The artwork, by Tanja Donner who also illustrated Candamir, is very colorful and detailed, without being too busy or garish. The rules are excellent, in color and with an overview of the game as well as plenty of examples. The game comes with an abundance of thick tiles of varying size, cards, and colored wooden bits. All of these fit neatly in a custom plastic insert. I do wish that the cards had the same nice linen finish as the board and tiles, instead of being smooth, but they are sturdy enough.
Game play:
The object of the game is to achieve Victory Points by helping in the building of the city of Elasund.
Most buildings require both the necessary building permits and a cost in gold to build.
Victory Points are also earned by building segments of the city wall, contributing to the construction of
the large church and by building in key trading locations.
Players place their colored Victory Point Cubes on the board to mark each Victory Point earned.
The first player to place his ten cubes wins the game.
This clever way of keeping track of Victory Points is also used in Candamir and makes it easy to
assess the progress of players with only a quick glance at the board.
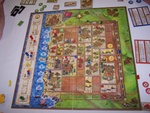
Elasund board, initial setup
The board depicts the building area of the city of Elasund with a grid of building spaces. The city is bordered on three sides with spaces for building a city wall. This wall is adjusted to shrink or increase the city area depending on the number of players. City Gate Tiles to mark the corners are included to make this adjustment. The west side of the city borders a harbor with a track running along it numbered from 2 to 12, minus the 7. The wooden Trade Ship is placed on this track. Running down the left side of the board is another track to keep track of players' Trade Points. As they earn these they move their marker up the appropriate number of spaces. Finally, there is a reference illustration that shows the layout of the church and a spot marked in the city where the first Church Tile must be placed.
Each player starts the game with two buildings already on the board in designated locations, as well as 3 Gold Cards and 1 randomly drawn Influence Card. Besides these, each player also has 10 Victory Point Cubes, 5 Permit Tokens numbered 0-4, nine City Wall Tiles numbered from 1-9 and two other personal building tiles.
The Gold Card stack and the shuffled Influence Cards are placed near the board. The 9 Church Tiles are placed facedown near the church illustration and player markers are placed at the bottom of the Trade Point track. The neutral building tiles are sorted by size and stacked in easy reach of the players.
Each turn, the player does the following actions in order. The first action is required, but the rest are optional. Each player has a reference card that summarizes these nicely:
- Roll the dice for production
- Build up to two things
- Place 1 building permit or take 2 gold
- Take a special action
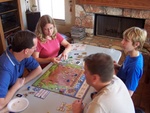
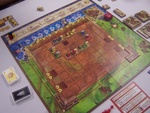
Susan teaches Elasund to Mark, Kevin and Mike
Here we find a similarity to Settlers of Catan, a production roll that potentially yields all players resources.
Two dice are rolled and the Trade Ship is moved on the harbor track to the number equal to the sum of the dice.
Any buildings that are in or partially in that row on the grid will produce the resource shown on the building tile for its owner.
Resources are either Gold Cards or Influence Cards. Influence Cards come in three different colors and are drawn randomly from the stack.
All resources are kept hidden in the player's hand.
Special case: A roll of "7" means that pirates attack and no resources are produced.
This will be discussed later.
Building
The active player may now build up to two of any combination of the following:
- Build his own or a neutral building. Buildings come in several sizes covering 1, 2, 4, or 6 squares. Each building shows a cost in gold and the number of Building Permits that are required to build it. The Building Permits must be already present on the board in the squares where you want to build. The player pays the cost in Gold Cards to the bank, removes and returns the Building Permits to their owners, and places the building. If it is a neutral building, he places a Victory Point Cube in the designated spot on the building tile. What can be nasty is the fact that you can use other players' Building Permits along with your own as part of the cost for your building. To do this you do have to have the greater total value of Permits, which is determined by adding up the numbers on the Permits. The player must pay the value of any removed Permits to their owners, however. Even more evil, you can build over all or part of a smaller building, causing it, and any Victory Point Cubes to be removed from the board. If you discard three matching Influence Cards, you can build over a building of the same size. This can cause some fierce area control battles for prime building spots or from players trying to protect their buildings.
- Build a City Wall Tile. Each player has a numbered set of these and they must be built in order. Every third one allows the player to place a Victory Point Cube while the others immediately give him one or two Influence Cards. Each Wall Tile costs either 2 or 4 gold, depending on where it is placed. There are only a limited number of wall spaces and the cheaper spots tend to go quickly.
- Build part of the church. The church is made up of nine single square tiles that are built one-at-a-time to form a 9x9 building. Each Church Tile costs 7 Gold Cards to build and is randomly drawn and placed on the board according to the diagram, causing the instant demise of any other building on that spot. While very expensive, the nice thing about Church Tiles is that each is a safe Victory Point as they can never be built over. The first player to build a Church Tile has a slight advantage in that he gets to draw the top two tiles from Church Tile stack, choose one to be built first, placing the other at the bottom on the stack. In this way he can determine somewhat over which nine spots the church will be built and hopefully not threaten his own buildings.
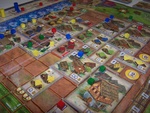
Elasund board, midgame
After building, a player may place a Building Permit on the board in the row that has the Trade Ship. Or, by playing two matching Influence Cards, he may place a Permit in any row. Permits must be placed in an empty spot and the cost in gold is equal to the number on the Permit. This is the same number that is used in determining area control when building. Only getting to place Permits after a player has done his building for the turn enables the other players to guess his future plans and act accordingly.
A player may forgo placing a Permit and instead take 2 Gold Cards.
Special Actions
The last thing that a player can do is on his turn is use Influence Cards to take one Special Action. He can pay two matching Influence Cards and either move one of his Building Permits on the board to any other free space or upgrade a Building Permit to a higher-valued one, paying the difference. His other choices for Special Actions are to use three different Influence Cards to either place a Building Permit on the row of his choice (again, paying the gold cost) or to just take two Gold Cards.
Trade Fields
Yet another way a player can get Victory Points with buildings is by earning Trade Points. Along the sea and near the City Gates are spots that show one or two windmills. Building over these locations earn the player one or two Trade Points, allowing him to move his marker up the Trade Point track. As he gets to certain locations on the track, he may place a Victory Point Cube on the designated spot. However, as the track goes higher, the spots for Victory Points become fewer in number so not all players will be able to pursue this strategy. And, if a player loses a building covering any Trade Fields, he loses those Trade Points and any associated Victory Points as well. In this way, a player can make another lose multiple Victory Points by demolishing a single building. Brutal!
Close up of the Elasund board
The last thing feature I haven't discussed is what happens when a "7" is rolled on the resource roll. This is somewhat similar to the robber in Settlers of Catan. The Trade Ship now becomes a pirate ship instead. No resources are produced and the player instead chooses on which row to place the Trade Ship. Players must discard a Gold or Influence Card for each Victory Point that they have on that row, including Victory Points on city walls. If the player moving the Ship has done his duty in protecting the city by helping to build the city wall, he may randomly draw from those discards the number of cards equal to his Victory Point Cubes on City Wall Tiles. He now continues with his turn as normal.
One of the interesting aspects of the pirate is that since it allows you to move the Pirate (Trade) Ship to the row of your choice, you might base your decision on where you would like to place a Building Permit that turn, rather than on making your fellow players pay.
The game ends instantly when a player places his tenth Victory Point Cube.
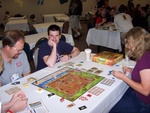
Playing Elasund at BoardgameGeek.CON
Comments:
Elasund has a few clever dual-purpose, interlocking mechanisms that work together really well.
The resource rolls both determine what buildings produce as well as where a Building Permit can be placed that turn for future building.
City Wall Tiles can be built with both Victory Points in mind as well as Resource Cards when a Pirate is rolled.
Influence Cards can be collected and used in several ways.
Also clever is how there are multiple strategies for pursuing Victory Points, but not enough available for every player to pursue each one.
The different elements of the game seem very balanced.
I really like how the luck is handled in this game to give players options. While a player may get unlucky with the resource rolls, he can always skip placing a Permit and get two Gold Cards instead. Collecting sets of Influence Cards depends on a random draw, but there are different things one can do with identical sets as well as sets of different colors. A player must be ready to tweak his strategy based on what fate deals him and I really like that feature. Sure, you may be unlucky, but you can still do something and feel like you are still in the game. There will, however be some cases where a player falls way behind due to a combination of bad dice rolls and being a picked on by other players. This is rather unfortunate but not surprising in a game with a lot of direct player conflict.
I was a little worried that the game could drag out too long with players ganging up on the leader. However, this did not seem to be the case and my games were all in the stated 60-90 minute range. The end of this game often comes down to a tight, tense tug-of-war between two or more players. An aggressive play by another player can raise his Victory Points while at the same time removing more than one Victory Point Cube of another player's, if a building is demolished that also loses Trade Points. Eventually though, with careful planning and perhaps a dollop of luck, a player will manage to pull off a last building for the victory. It feels very satisfying to win a game this way.
The game works equally well with either three or four players. Adjusting the size of the building area for differing numbers of players creates enough crowding to keep the game tense. I have not played the game with just two players, but I have a hunch it will work well also.
Elasund is a fantastic game design, perhaps one of Klaus Teuber's best. Do not be fooled by the Settlers of Catan trappings; Elasund is a very different game that stands on its own merits. Like most European designs, the rules are simple but the game play is very engaging. Some players may find the Settlers-like luck element aggravating, but Elasund does have some built-in features to help mitigate bad luck. There is a lot of direct player interaction and high degree of "nastiness" that will delight many players, but be a turn-off for others. If you enjoy medium-weight confrontational games, then Elasund is one you shouldn't miss.
| Other Web information: |
This page viewed
E-mail Ed Rozmiarek with questions or problems concerning this page.
Copyright © 2005, Ed & Susan Rozmiarek. No portion of this website may be reproduced or copied without the consent of Ed or Susan Rozmiarek.